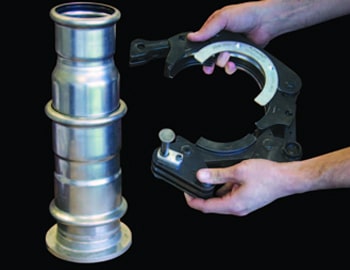
Press Fit System Installation

During the transport and storage of the pipes and joints it is necessary to take suitable precautions to avoid the danger of damage and contamination of dirt and humidity inside them. During transport and storage it is necessary to pay due attention to temperature variations that may cause condensation to form and are particularly harmful to carbon steel.

Contact among stainless steel pipes and carbon steel pipes is to be avoided. The same consideration also applies to the storage of the fittings.

The handling of pipes must be done individually to avoid any scratching.

Europress 15, 22, 28 &35 Press Joint Instructions
installation-step1
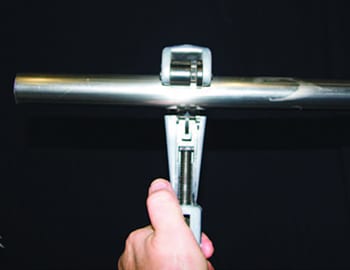
CUTTING:Cut the pipe using burr free approved cutters. Do not use oxy-acetylene or abrasive cut off wheels.Pipes must be cut at right angles to their axis, using a pipe cutter or fine-tooth saw, taking into account the depth of insertion into the fitting.
installation-step2
DEBURRING:All pipe cuts must be carefully deburred, both inside and outside, using a manual or electric deburring tool. Any cutting residue (swarf) must be removed to preclude damage to the O-ring when the pipe is inserted into the fitting, avoiding possible leaks.
installation-step3
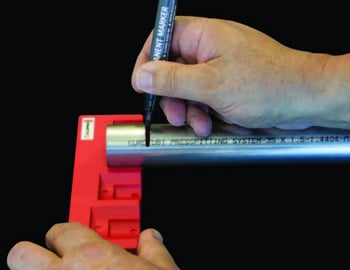
WITNESS MARK INSERTION DEPTH:To ensure a correctly inserted joint the pipe must be marked with a fine-point felt -tip pen where it meets the fitting using the Europress depth gauge so that full insertion can be verified.
installation-step4
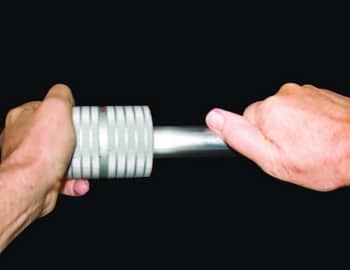
ASSEMBLE FITTING ON TUBE:Before assembling the fittings, the positioning of the o-rings must be checked and, if necessary, lubricate O-ring with water or talc to ease the insertion of the pipe. Oils, greases, glues or other similar substances must on no account be used. The pipe is inserted in the fitting with a slight rotating motion until it hits the stop. Check pipe is fully inserted to witness mark
installation-step5
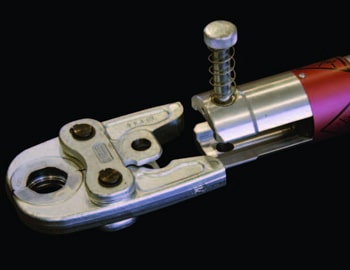
PRESS TOOL & JAW :The pressing tools must be equipped with M-shaped profile jaw attachments or pressing jaw corresponding to the diameter of the fitting to be pressed. Retract the lock pin, position the jaws into the tool head and ensure the lock pin is fully engaged.
installation-step6
POSITION PRESS JAW :Open the jaws by squeezing the two ends together, then position jaws over the fitting so that the internal channel of the jaws form a perfect fit round the toroidal seat of the fitting. Release the jaws and check for a snug fit.
installation-step7
PRESS JOINT :Initiate the press cycle by squeezing the trigger hold until press cycle is completed. Do not allow interruption to the press cycle. If the fault/low battery light comes on or warning beep sounds, the joint is NOT ap-proved. If the hydraulic ram stops mid-cycle the automatic reset function can be manually over-ridden by depressing the reset button

Check L.E.D. light after each press. If it comes on,battery must be recharged or changed before attempting the next press. See trouble-shooting guide.

Europress 42, 54, 76.1, 88.9 & 108 Press Joint Instructions
Cento; Untergestell
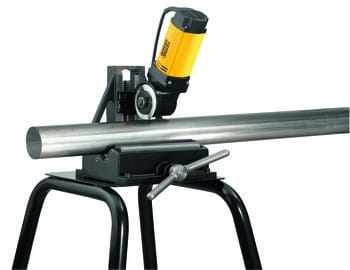
CUTTING:Cut the pipe using burr free approved cutters. Do not use oxy-acetylene or abrasive cut off wheels.Pipes must be cut at right angles to their axis, using a pipe cutter or fine-tooth saw, taking into account the depth of insertion into the fitting.
step-1
DEBURRING:All pipe cuts must be carefully deburred, both inside and outside, using a manual or electric deburring tool. Any cutting residue (swarf) must be removed to preclude damage to the O-ring when the pipe is inserted into the fitting, avoiding possible leaks.
step-3

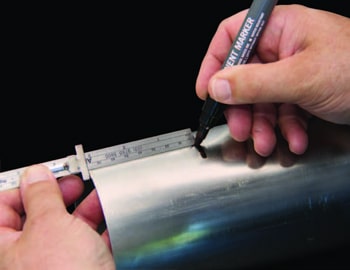
WITNESS MARK INSERTION DEPTH:To ensure a correctly inserted joint, the pipe must be marked with a fine-point felt-tip pen. 42 & 54 Use the Europress depth gauge.Large sizes use rule (pictured)

  • 76.1 mark at – 55mm
  • 88.9 mark at – 63mm
  • 108 markat – 78mm
  • 140 markat – 97mm
  • 169 markat – 117mm
step-4
ASSEMBLE FITTING ON TUBE:Before assembling the fittings, the positioning of the o-rings must be checked and, if necessary, lubricate O-ring with water or talc to ease the insertion of the pipe. Never use oils, greases, glues or other similar substances. The pipe is inserted in the fitting with a slight rotating motion until it hits the stop. Check pipe is fully inserted to witness mark
step-5
ATTACH PRESS COLLAR :The pressing collar must be M- shaped profile corresponding to the diameter of the fitting to be pressed. Retract the lock pin, open the jaws and position the jaws around the fitting.
step-6
LOCK COLLAR :Ensure that the internal channel of the jaws form a perfect fit round the O-ring seat of the fitting. Ensure the lock pin is fully engaged.
step-7
ATTACH ADAPTOR :Squeeze the back of the adaptor arms together and hook onto the pressing collar.
step-8
CONNECT PRESS TOOL :Retract the lock pin, engage the adaptor and make sure lock pin is fully engaged.
step-9
PRESS JOINT :Initiate the press cycle by squeezing the trigger hold until press cycle is completed. Do not allow interruption to the press cycle. If the LED light comes on or warning beep sounds, the joint is NOT approved. If the hydraulic ram stops mid-cycle the automatic reset function can be manually over-ridden by depressing the reset button– Any tool malfunction, check with our Technical dept. Do not continue using tool without approval